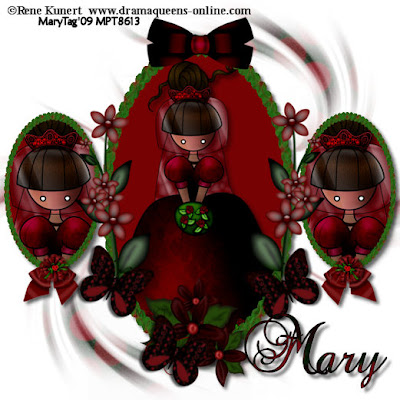
Tube of choice,I am using Rene Kunert,which you can purchase here,do not use unless you have a license to do so.
Scrapkit is Dark Wedding from Rene Kunert also and you can purchase it over at MPT here. I love this kit,its awesome! Thank you Rene!
Template of choice,I am using template 60 from Bev at HorsePlays Pasture here. Thank you Bevie!
Mask of choice,I am using Vix_Mask 106 here. Thank you Vix!
Font of choice,I am using Precious here.
-This tutorial was written assuming you have working knowledge of PSP-
Open mask,minimize.
Open template/delete credit layer.
Highlight background layer/paste paper 1 as a new layer/right click on paper layer/new mask layer/from image/select mask/ok/layers/merge/merge group/layers/duplicate/position both mask layers.
Highlight middle oval layer/flood fill with color to match your tube,I used #760204/repeat on left&right oval layers.
Highlight middle oval frame/magicwand/edit/paste paper 2 into selection/deselect/repeat on left&right oval frames.
Back to middle oval layer/click on the oval with your magicwand/paste tube/position/selections/invert/delete/deselect/dropshadow:
Vertical 5
Horizonal 5
Opacity 57
Blur 9
Repeat on left&right oval layers.
Hide mask layers and white background layer/layers/merge/merge visible/dropshadow:
Vertical 4
Horizonal 4
Opacity 62
Blur 7
Unhide layers.
Paste bow 4/resize 17%/position/same dropshadow we last used.
Paste bow 3/resize 50%/edit/repeat resize/layers/duplicate/position/same dropshadow.
Paste flower 2/resize 15%/position/same dropshadow.
Paste butterfly 1/resize 50%/layers/duplicate 2 times(for later use)position/dropshadow:
Vertical 3
Horizonal 3
Opacity 65
Blur 4
Paste extra 1/resize 50%/edit/repeat resize 2 times/layers/duplicate/position both/same dropshadow.
Paste flower 6/resize 30%/edit/repeat resize/position on the left/layers/duplicate/image/mirror/same dropshadow/position the 2 extra butterflies over flower stems.
Layers/merge/merge visible.
Image/resize all layers 13%.
Add copyrights.
Add name.
*I used paper 1 for fill/black on foreground.
Save.
*Make sure to name your tag differently than the template/save as jpeg png etc.
Hope you enjoyed my tut,would love to see your results.
Email me
Hugs,Mary


2 comments:
Thank you! You do some of the cutest tags! Thank you so much for using my Tube and Kit! I just love this tutorial. I will be posting it on my site :D
Thank you Rene,so glad you like what I did with them both! and your very welcome,can't wait to see what else you come out with :D
I will look on your site for an email addy,or you can contact me at my gmail,and I will send you a tag with your name :)
Hugs Mary
Post a Comment